Why Run SQL Server in a Container?
The concept of containerization has been around for a while in software, but it has become more widely used over recent years. While running a database inside of a container may not be ideal for production situations, it can be great for development setups. With containers (in our case using Docker to configure, build and run the containers) we are able to quickly and consistently spin up a database from scratch. This can be great for sharing database configurations and onboarding developers. Containers are by no means a silver bullet, but when used in the right context they can really benefit developer productivity. With all of that in mind, let's jump into the first step of getting SQL Server running on a Linux Docker container.
Setting Up the Docker Compose File
In this post, we'll be using Docker Compose to set up and run our containers. If you're not familiar with Docker Compose, it is essentially a tool for defining and running Docker applications based on a YAML configuration file. Typically Docker Compose comes in handy when there are multiple container applications that need to be run, but in this example we'll just have our one database container to configure and run. If you'd like to learn more about Docker Compose, check out their documentation here.
Inside the directory where you'd like to store the Docker Compose file create a new file called docker-compose.yml. This is the standard file name for being able to run containers with a single command. With the file created, we can now configure the environment for our SQL Server Docker application. Add the following contents to the docker-compose.yml.
version: "3.4"
services:
  db:
    image: mcr.microsoft.com/mssql/server
    ports:
      - 1434:1433
    environment:
      ACCEPT_EULA: Y
      SA_PASSWORD: ${SA_PASSWORD}
    volumes:
      - data:/var/opt/mssql
volumes:
  data:
Without going through the details of the Docker Compose syntax here is a breakdown of what is happening in the docker-compose.yml.
- Define the Docker image to be used for the container (in this case mcr.microsoft.com/mssql/server)
- Configure the ports that the application will be using. The first number (1434) is the port exposed to the Docker host and the second (1433) is the port used inside of the Docker container
- Images can provide environment variables and this is what we see with
ACCEPT_EULAandSA_PASSWORD- Notice that the value for
SA_PASSWORDis a variable. This variable can be defined in a.envfile to make sure it is kept secret
- Notice that the value for
- The final piece is defining a volume that allows a host path to be mounted to the container
- This is what allows the data to be persisted on the host machine since the container can be started and stopped frequently
Now we're ready to run the container! This can be done by running docker-compose up -d from the terminal in the same location as our docker-compose.yml file. The -d flag will detach the running of the docker container from the terminal instance so that we can continue to make terminal commands without opening a new terminal tab or window.
After running docker-compose up -d, we can run docker ps to view currently running containers. If the up command was successful, we should see a line with SQL Server running. Next, we'll look at how we can restore a database from a backup into our SQL Server container.
Restoring a Database
For this portion of the post, we'll be using the classic AdventureWorks database and Azure Data Studio. First, we'll need to go out and download the backup file for the AdventureWorks database, which can be found here.
Before we can restore from the backup, we'll need to create a directory inside of the container to store the backup file. This can be accomplished by running the docker exec command which makes it possible to run terminal commands inside of the running Docker container. The only variable piece of the command below is the e622d1df5d19 value, which is the Container ID of the running container. This value can be found by running docker ps and finding the correct Container ID in the resulting list.
docker exec -it e622d1df5d19 mkdir /var/opt/mssql/backups
Next, we'll want to copy the backup file to a location inside of the running Docker container. Luckily Docker provides a convenient copy command to accomplish this. Notice that this command also uses e622d1df5d19 for the Container ID, which will be specific to the container itself. This command will copy the backup file to the location that we created in the previous step.
docker cp ./AdventureWorks2019.bak e622d1df5d19:/var/opt/mssql/backups/
At this point, we're ready to open Azure Data Studio, connect to the database, and restore the AdventureWorks database from backup. First, we'll click the "New Connection" button and enter the connection details. The database username will be SA and the password will be the one defined in the docker-compose.yml or .env file. Apart from the server, we'll need to enter the port number as well and from our example above that would be 1434.

Once connected we'll be taken to the landing page for the server, which includes a "Restore" button. We can click that button to be shown the option of selecting the restoration source. In that dropdown, we'll select "Backup file".


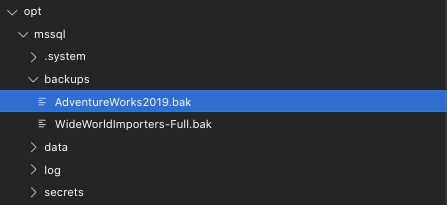
In the "Backup File Path" field we can click on the ellipsis to be taken to a directory tree and navigate to the location that was specified previous (/var/opt/mssql/backups/).
Now we're ready to click the "Restore" button and view the restore progress which is displayed in the bottom pane of Azure Data Studio. With all of this in place, we're ready to start querying the AdventureWorks database!
I hope this post was helpful in getting SQL Server setup to run in a Docker container. The steps can seem a little daunting, but once configured you'll be up and running with a database in no time!